I haven't changed my idea this time so thats good, however I have a new URL which has a more relevant (more like less-irrelevant) title. This just makes it flow as a whole piece of work now.
Visit: jennywatling.blogspot.com
Friday 8 July 2011
Thursday 9 June 2011
Stiffening Fabric
In an effort to find other ways to harden fabric in the style of WW2 aircraft makers I came across something very interesting in Hobbycraft. Right next to the model aircrafts was a tiny pot of Cellulose Dope, dope was what was used to cover the material on the body of the planes, though in WW2 this was more likely to be butyrate dope. This gave me a chance to experiment with a new substance and see it's effects on the fabric whist keeping in touch with the WW2 roots of the process.
I used the helmet as a base and some odd piece I had knitted from thick red wool then brushed the dope on to it with a medium coating. Once this had dried it easily came off of the helmet and was much more firm and stiff than previously, though in comparison to the resin I have used, it was flexible and somewhat unstable. In a way this was a good thing, I wanted to preserve the appearance and texture of the materials but also making them more structural which was kind of achieved. My issue with this is that it wasn't really as strong as I wanted it to be, it had the feeling of nearly breaking or losing shape, neither of which would be very helpful. It was also a cost issue, that tiny pot cost about £4 and about 25% of it was used on that little experimental piece, so hardening a whole suitcase or rifle would be expensive.
I also tested the effect of PVA glue on the fabric in the same way as the Dope. This produced nearly identical results, though the dope may have been a little more solid. To me this concludes that if I wanted to use an alternative method to hardening the fabric than using resin, PVA would be a better option than the Cellulose Dope as it gave near enough the same results for a lot less money and it is much more accessible in large quantities.
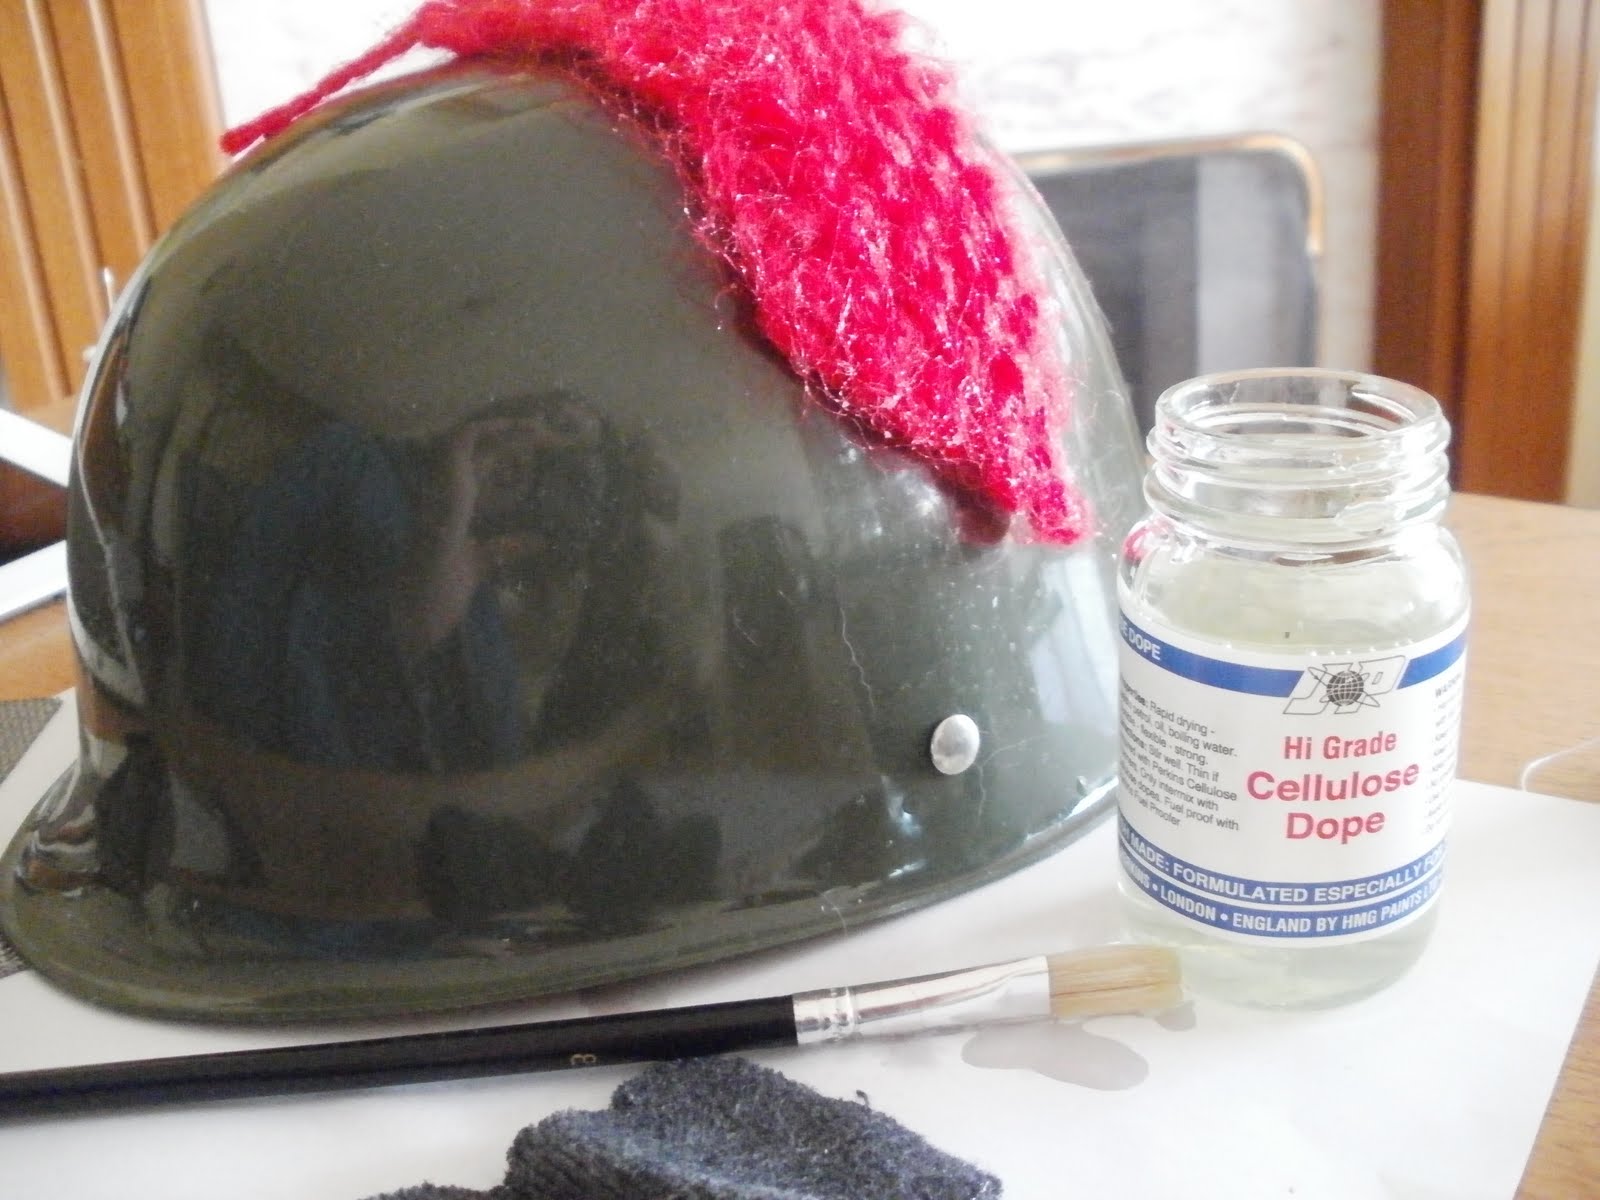 |
| Helmet Test With Dope |
 |
| Red Piece- Dope, Brown Piece- PVA |
Sunday 29 May 2011
Hand Stitching
The thing I noticed most after creating the cigarette pack is the apparent urgency of the stitching. It looks a bit untidy and rapid and I think that represents the urgency and the need to have that object quickly was important to the soldiers. I was originally going to use a sewing machine to do the stitching on most of the objects, but because of the way the hand stitching looks and the fact that it feels more human, (going back to the anthropomorphic base that I started this whole project on) I want to hand sew the objects.
 |
| Housewife Sewing Kit |
This also links in with the soldiers during the war because they were issued a "Housewife Sewing Kit" and this was to repair clothing and equipment on the frontline, and clothing repairs were likely to be more of a women's role if they were at home. Sewing and knitting were also used as occupational therapy to soldiers who returned injured, so it would have been a newly required skill, therefore the quality may not be as good, but the inflections would tell more of a story about the person who made the piece.
 |
| Man Knitting as Part of the War Effort |
Thursday 19 May 2011
Making the Cigarette Packet
I decided to firstly create the cigarette packet as it seemed the most simple one to start off with and I had a good reference:
The lucky strike brand of cigarettes

The lucky strike brand of cigarettes

Dimensions: 2.25 X 2.8 INCHES (unsure of depth)
This brand of cigarettes were given to soldiers for free and though being an American brand some British troops smoked them. To make them in a feminine way I used felt, old socks and embroidery. I chose this because looking at the items such as the "Dig for Victory" embroidered poster as well as the make do an mend initiative meant I was using similar techniques to that of what the women in WW2 did, linking the masculine and the feminine.
I think overall this went well, although the stitching is somewhat crude, I like that about it because it adds a human element to it because it was hand sewn. I also realised that I can keep some objects that I am creating soft, rather than using resin or PVA etc. on them and they will retain shapes, though I don't think this will work as much on a larger scale where more structural support would be needed.
Objects I would Like to Create
From looking at the things in the war museum and after the research I have been doing I have got an idea of what objects I want to re-create in a feminine way.
1. Demob suitcase
2. Gas Mask
3. Grenade
4. Helmet
5. Cigarette pack
6. Boots
7. Letter from home
8. Gun
This may turn out to be too many objects to create in the time I have left, but these are what I would like to have done.
I have also been considering the ways that the women made things in this time to give the feminine feel to the objects. The main ones I have found are knitting, crochet and sewing which were all important for the Make do and Mend initiative set up by the Ministry of Information. I also found the plane fabrication interesting and the result from the wool and resin experiment shows that I can make some objects in this way. In the Make Do and Mend book there are also tips on creating decorative patches for reinforcing clothing, this gives me the idea of also using patchwork to create items from old clothes.
Wednesday 18 May 2011
Trip to the Imperial War Museum
Yesterday to learn more about the objects from the war I visited the war museum in London. Though the Demob and VE day things they had were limited I found it really useful to get a proper look at all the soldiers gear and weapons and there was a good amount of information about life in Britain and the Home Front.
Here are some pictures:
(quality could be better but my camera broke so this is on a Blackberry)
This visit helped to identify the important objects in the war to the soldiers and also gave me more information on make do and mend and the women's roles in the war. I managed to purchase the Made do and Mend book as well as some replica documents like leaflets and letters that were aim at women during the war. I aim to look to these for inspiration but now I think I have the objects I want to create so it now comes down to creating them.
Here are some pictures:
(quality could be better but my camera broke so this is on a Blackberry)
 |
This visit helped to identify the important objects in the war to the soldiers and also gave me more information on make do and mend and the women's roles in the war. I managed to purchase the Made do and Mend book as well as some replica documents like leaflets and letters that were aim at women during the war. I aim to look to these for inspiration but now I think I have the objects I want to create so it now comes down to creating them.
Monday 16 May 2011
Knitted Fabric in Resin
Today I wanted to experiment with the material I want to use and the effect that resin will have on it to hold it's shape. I want the fabric to clearly follow the shape of the objects I am going to recreate so I need to make sure that this method will work for that, but I also want the feel and look of the fabric to be preserved in a way to get a more authentic look to the objects.
This was the experiment:
What I found was that when dried the material did keep some properties but not completely and in some places it was lost completely because of the shape it was being formed in to. I also noticed that the more intricate and tighter stitched fabrics lost a lot more of their original texture and look than the looser fabrics. This is probably because they absorbed more resin which stayed in the fabric when dried compared to the looser ones where the resin had more gaps to creep out of. My personal favourite piece from this experiment is the rounded crochet pattern (number 4), this is because to me it really resembles a soldiers helmet and because of the stitching and the colour, it also looks feminine.
In summary I think that this method works and I like the historical links to the way that the planes were fabricated, but it is limited and I think the mixture of wool and resin isn't suitable for more detailed objects. One thing I would like to try next is trying other types of fabric in the resin like lace and cotton to see the effects that resin has on those and also to try other methods of stiffening the knitted fabric that can keep the properties of it more.
Subscribe to:
Posts (Atom)